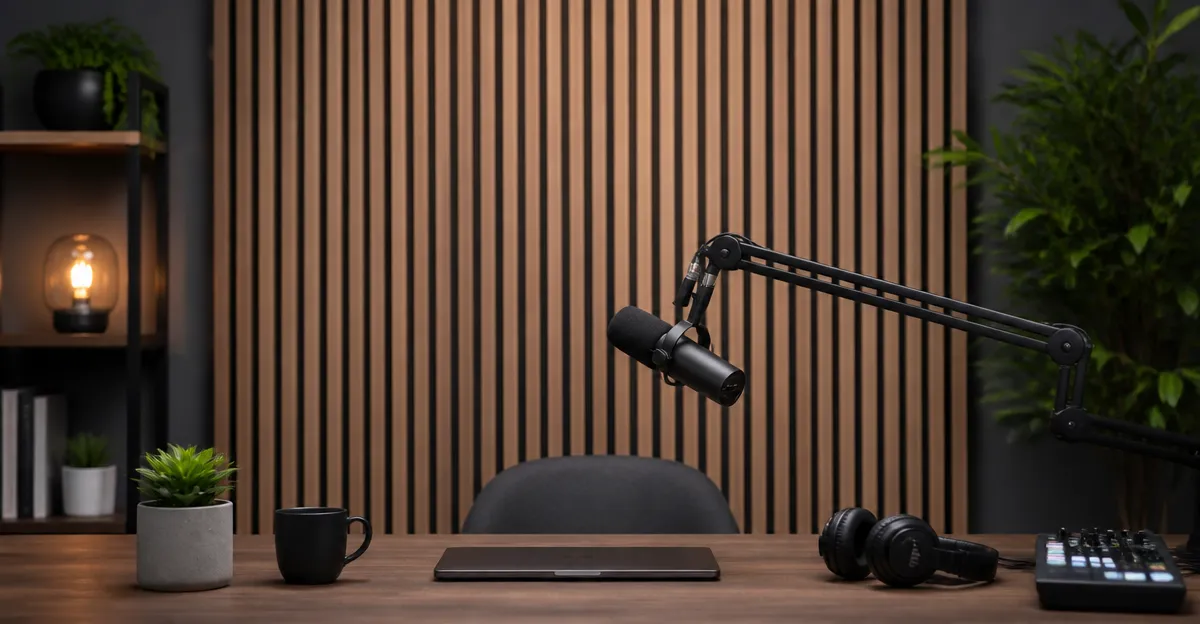
How to Build a DIY Acoustic Backdrop for Your Video Podcast: Step‑by‑Step, Budget‑Friendly Guide to Professional Sound and Look
Introduction
In this guide the reader will discover how to design and construct an acoustic backdrop that improves audio quality while providing an attractive visual environment for video podcasts. A well‑treated backdrop reduces reverberation, eliminates distracting background noise, and creates a consistent visual theme that enhances audience perception. The process described is affordable, adaptable to a range of room sizes, and relies on readily available materials that can be purchased online. By following each step the reader will achieve a professional‑grade setup without the need for costly studio construction.
What You'll Need
- Measuring tape and level
- Utility knife or saw for cutting panels
- Drill or screwdriver
- Construction adhesive or heavy‑duty double‑sided tape
- Safety glasses and dust mask
- Optional decorative lighting
The following products have been selected for their balance of performance, price, and ease of installation. Each product is linked at its first mention.
Step 1: Assess the Space and Determine Panel Coverage
Begin by measuring the wall area behind the camera that will serve as the backdrop. Record the width and height, then calculate the total square footage. For a typical podcast desk the ideal coverage ranges from 30 to 60 square feet, providing sufficient surface to absorb mid‑range frequencies without overwhelming the room. Use a level to mark a horizontal line at ear height; this line will guide panel placement and ensure visual consistency.
When the dimensions are known, select a primary acoustic material. TONOR Wood Slat Wall Panels offer a high‑density polyester core, medium‑density fiberboard, and a walnut veneer that delivers both sound damping and an elegant appearance. Each panel measures 47.2" x 23.6" (120 cm x 60 cm) and costs $99.99 for a four‑pack, earning a rating of 4.4 out of 5 stars from 1,136 reviews. The panels can be cut to size, allowing precise coverage of the measured area.
Calculate the number of panels required by dividing the total square footage by the coverage per panel (approximately 15.5 sq ft). If the calculation yields a non‑integer result, purchase an additional panel to allow for trimming and future adjustments.
Step 2: Prepare the Wall Surface
Clear the wall of existing decorations, nails, and dust. If the wall is painted, ensure the surface is clean and dry; a lightly sanded finish improves adhesive bonding. For drywall, apply a thin coat of primer if the surface is glossy. This preparation step maximizes the acoustic coupling between the wall and the panels, preventing unwanted resonance.
Mark the panel layout on the wall using a pencil and a straight edge. Start from the bottom left corner and work outward, leaving a small gap of approximately 1/2 inch between panels to allow for thermal expansion and to create a subtle visual grid.
Before committing to permanent attachment, position the panels against the wall to verify alignment and visual balance. This dry‑fit stage helps avoid unnecessary drilling and ensures that the final appearance meets expectations.
Step 3: Install the Primary Wood Slat Panels
Secure the first row of TONOR Wood Slat Wall Panels using the supplied screws. Each 2‑piece set includes 35 screws; for larger orders additional screws are provided. Drill pilot holes at the marked points, then drive the screws through the wood veneer into the wall studs. This mechanical attachment ensures long‑term stability and prevents panel sagging.
If drilling is not desired, heavy‑duty double‑sided mounting tape can be applied to the back of the panels. The tape must be pressed firmly for at least 30 seconds to achieve a strong bond. This method is especially useful for renters who wish to avoid permanent wall damage.
After the first row is fixed, continue installing subsequent rows, checking level after each panel to maintain a straight line. The high‑density core of the panels absorbs mid‑frequency reflections, while the wood veneer adds visual warmth that complements most studio lighting setups.
Step 4: Add Diffusive Foam for Balanced Acoustics
While wood panels excel at absorption, diffusive elements prevent the space from sounding overly dead. SD SODOCT Pyramid Foam Panels feature a unique pyramid shape that increases surface area, enhancing diffusion and adding a modern aesthetic. The 24‑pack of 2‑inch thick foam costs $34.99 and holds a rating of 4.0 out of 5 stars from 2,392 reviews.
Apply the foam to the upper portion of the backdrop or to the side walls where reflections are strongest. Use construction adhesive or nano double‑sided tape (not included) to attach each panel. The foam’s flame‑retardant composition meets safety standards, making it suitable for home studio environments.
Arrange the pyramid panels in a staggered pattern to avoid creating regular visual lines. This arrangement also improves acoustic scattering, resulting in a more natural sound field that benefits spoken word recordings.
Step 5: Fill Gaps with Budget‑Friendly Wedge Foam
For smaller areas such as corners or behind equipment, Saiqiang Acoustic Foam Panels provide an economical solution. Each wedge measures 1" x 12" x 12" and costs $14.99 for a 12‑pack, with a rating of 4.0 out of 5 stars from 919 reviews. The high‑density foam reduces echo without adding significant bulk.
These panels come vacuum‑packed; allow 24–48 hours for full expansion before installation. Attach them using the included sticky tabs or a small amount of construction adhesive. Their low profile makes them ideal for mounting behind monitors or on shelving units where space is limited.
By layering wedge foam behind the primary wood panels, the overall absorption coefficient of the backdrop increases, resulting in clearer vocal recordings and reduced room coloration.
Step 6: Incorporate Decorative Hexagon Panels for Visual Interest
If the visual design of the backdrop is a priority, consider adding Ekkogo Hexagon Acoustic Panels. The 12‑pack of light turquoise hexagons costs $22.99 and carries a rating of 4.3 out of 5 stars from 633 reviews. Each panel is cut from high‑density poly‑fiber with an NRC of up to 0.95, offering both acoustic performance and a decorative pattern.
Mount the hexagons in a honeycomb layout on the lower third of the backdrop to break up the large wood surface. Use construction adhesive at each corner for a secure bond. The panels are odorless, flame‑retardant, and environmentally friendly, containing recycled water‑bottle material.
This visual layer creates depth, draws the viewer’s eye toward the speaker, and adds a pop of color that can be coordinated with studio lighting.
Step 7: Finalize Installation and Test Audio
After all panels are secured, perform a quick visual inspection to ensure alignment, level, and that no gaps remain. Clean any dust from the surface with a soft cloth. Then, conduct a sound test by recording a short spoken segment while moving the microphone at various distances from the backdrop.
Listen for lingering echo or flutter; if excessive reverberation persists, add additional foam or adjust panel placement. Most podcasters find that a combination of wood absorption and foam diffusion yields a balanced response that enhances vocal clarity without creating a dead room.
Finally, adjust lighting to avoid harsh shadows on the panels. Softbox or LED panel lights positioned at 45‑degree angles typically provide even illumination that highlights the wood grain and foam textures.
Tips & Pro Tips
- Use a laser level for precise horizontal lines; this reduces cumulative errors over large widths.
- When cutting wood panels, apply painter's tape over the cut line to prevent splintering.
- For renters, prioritize adhesive methods over screws to preserve wall integrity.
- Combine different panel shapes (slat, pyramid, hexagon) to achieve both absorption and diffusion, which is essential for speech clarity.
- Allow foam panels to fully expand in a well‑ventilated area before installation to minimize odor.
Troubleshooting
- Problem: Persistent echo after installation.
Solution: Add additional foam wedges in the corners and increase the density of diffusion panels on the upper wall. - Problem: Panels detach from the wall.
Solution: Verify that the wall surface is clean and dry; use screws anchored into studs for heavy wood panels. - Problem: Unpleasant foam odor.
Solution: Air the foam in an outdoor space for 24‑48 hours or gently wash with mild soap before drying.
Conclusion
This guide has demonstrated how to build a DIY acoustic backdrop that delivers professional sound quality and an appealing visual backdrop for video podcasts. By measuring accurately, selecting appropriate acoustic materials, and following systematic installation steps, the reader can achieve a balanced acoustic environment without excessive expenditure. The recommended products provide reliable performance, and the optional tips ensure long‑term durability and aesthetic cohesion. Implement these practices to elevate podcast production and engage audiences with crystal‑clear audio and polished visuals.
Products Mentioned in This Guide
Frequently Asked Questions
What materials are best for a budget‑friendly DIY acoustic backdrop?
Use affordable acoustic panels, foam wedges, or recycled moving blankets combined with a sturdy frame and optional decorative lighting.
How do I measure and size the backdrop for my podcast space?
Measure the width and height of the recording area, add a few inches for overlap, and cut panels to fit using a tape measure and level for accuracy.
Can I install the acoustic panels without drilling into walls?
Yes, heavy‑duty double‑sided tape or construction adhesive works well for temporary setups and avoids damage.
What tools are essential for building the backdrop?
A measuring tape, level, utility knife or saw, drill or screwdriver, and safety glasses are sufficient for most DIY builds.
How does a DIY acoustic backdrop improve audio quality?
It absorbs reflections and reduces reverberation, resulting in clearer speech and less background noise for video podcasts.