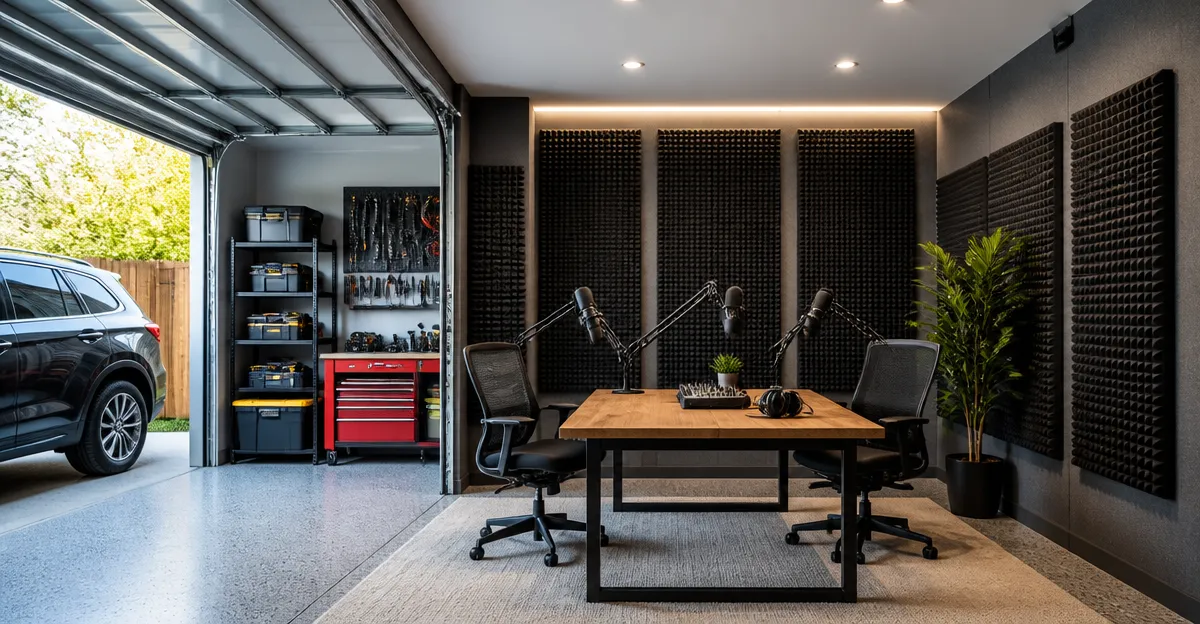
Ultimate DIY Guide to Soundproofing a Shared Garage for Your Podcast Studio
Introduction
The modern podcaster often faces the challenge of creating a professional recording environment in a space that was not originally designed for sound control. This guide explains how to convert a shared garage into a quiet, acoustically balanced studio without excessive expense. Readers will learn foundational acoustic principles, step‑by‑step installation methods, and how to select the most effective products for their budget. By the end of this article, one will possess a clear plan to achieve studio‑grade isolation in a garage that remains functional for other household uses.
Background and Context
Soundproofing involves two distinct objectives: reducing the transmission of external noise into the recording area, and controlling internal reflections that cause echo and coloration. Transmission loss is measured by the Noise Reduction Coefficient (NRC) and the Sound Transmission Class (STC); higher values indicate better isolation. Absorption, on the other hand, is quantified by the NRC, with values approaching 1.0 representing near‑perfect absorption across the audible spectrum. In a garage, common noise sources include street traffic, HVAC systems, and neighboring activities, while hard concrete walls and metal doors generate harsh reflections. Understanding these concepts enables one to apply the right combination of mass, damping, and absorption.
Assessing the Space
Before purchasing any material, conduct a simple audit of the garage. Measure the dimensions of walls, ceiling, and floor; note existing openings such as windows and the garage door. Identify the primary paths through which noise enters—typically the door, any gaps around the door frame, and the thin metal panels of the garage door itself. Document the level of ambient noise using a smartphone decibel app; values above 55 dB indicate a need for substantial treatment. This assessment will guide the quantity of acoustic panels, mass‑loaded barriers, and vibration‑damping mats required.
Key Strategies for Effective Garage Soundproofing
Three complementary strategies produce the best results: adding mass to block sound, applying damping materials to reduce vibration, and installing absorptive panels to control reverberation. Mass can be added with dense boards or specialized sound‑deadening mats. Damping materials such as butyl‑based sheets convert vibrational energy into heat, preventing it from traveling through metal structures. Absorptive panels, especially those with a high NRC, eliminate echo within the recording zone.
Product Recommendations
The following products have been selected for their proven performance, ease of installation, and favorable customer feedback. Each recommendation aligns with one of the three core strategies.
Mass and Damping
For garage doors and metal panels, a high‑density, self‑adhesive mat provides both mass and damping. The VOISEN 5mm Aluminum Car Sound Deadener offers 197 mil thickness, covering 31 sqft per kit, and is rated 4.3/5.0 by 140 reviewers. Its waterproof aluminum surface resists moisture, while the closed‑cell foam blocks 98% of radiant heat, contributing to both acoustic isolation and thermal comfort.
Key specifications include:
- Thickness: 5 mm (197 mil)
- Coverage: 31 sqft (28 pieces, each 15.7" × 9.8")
- Operating temperature: –40 °F to 300 °F
- Heat insulation efficiency: 98% radiant heat block
Installation is straightforward: peel‑back the protective film and press the mat onto clean metal surfaces. The product’s flexibility permits cutting around corners, making it ideal for the irregular geometry of garage doors.
Absorption Panels
To tame interior reflections, the ZonaSonic Brick Acoustic Foam Panels provide a high NRC of 0.95 and a sleek 3‑D brick design that doubles as décor. The 16‑pack of 12" × 12" panels costs $35.99 and has earned a 4.7/5.0 rating from 39 reviewers. Their ultra‑high‑density polyester foam (14.35 lb/ft³) ensures durability and consistent absorption across low and high frequencies.
Notable features include:
- High NRC: 0.95
- Ultra‑high density: 14.35 lb/ft³
- Self‑adhesive backing for tool‑free mounting
- Eco‑friendly, odorless, non‑toxic composition
These panels are especially effective when arranged in a staggered brick pattern on the walls surrounding the microphone area, reducing flutter echo and creating a balanced acoustic field.
Butyl‑Based Sound Deadening
For floor and ceiling vibration control, the KILMAT 80mil Butyl Car Sound Deadener delivers superior adhesion and thickness at an affordable price of $24.95. With a 4.8/5.0 rating from over 26,000 reviews, it provides 80 mil (2 mm) of butyl‑filled foil that adheres firmly to wood or metal substrates. The product’s weight of 0.5 lb per square foot ensures effective mass loading without excessive bulk.
Key attributes include:
- Thickness: 80 mil (2 mm)
- Coverage: 10 sqft per roll
- Self‑adhesive butyl layer for strong bonding
- Visual embossing indicator for proper installation
Applying this mat to the garage floor beneath a floating wooden platform reduces structure‑borne noise from traffic and HVAC vibrations, creating a quieter foundation for recording equipment.
Comparison and Selection Guide
| Feature | ZonaSonic Brick Panels | VOISEN Aluminum Deadener | KILMAT 80mil Butyl |
|---|---|---|---|
| Primary Function | Sound absorption (high NRC) | Mass loading & vibration damping for metal surfaces | Butyl‑based damping for floors/ceilings |
| Thickness | 0.4" (10 mm) | 5 mm | 2 mm |
| Coverage per package | 16 panels (12" × 12") | 31 sqft (28 pieces) | 10 sqft |
| Price (USD) | $35.99 | $26.98 | $24.95 |
| Average Rating | 4.7/5 (39 reviews) | 4.3/5 (140 reviews) | 4.8/5 (26,221 reviews) |
| Installation | Self‑adhesive, peel‑and‑stick | Peel‑back adhesive, cut to shape | Self‑adhesive butyl, embossing guide |
| Best Use Case | Wall absorption in recording zone | Garage door and metal panel damping | Floor/ceiling vibration isolation |
When selecting products, consider the dominant noise path. If street noise penetrates primarily through the garage door, prioritize the VOISEN deadener on the door surface. For internal echo, allocate the ZonaSonic panels to the walls behind the microphone. Finally, address structure‑borne vibration with the KILMAT mat under any raised flooring or ceiling panels.
Step‑by‑Step Installation Process
- Prepare the Surface: Clean all metal and wooden surfaces with a mild detergent, then dry thoroughly. Remove any rust or paint flaking from the garage door to ensure adhesive contact.
- Apply Mass Loading: Cut the VOISEN deadener to fit the garage door panels, leaving a 1‑inch overlap at seams. Peel the backing and press firmly, using a roller to eliminate air bubbles.
- Install Floor Damping: Lay the KILMAT 80mil mat on the garage floor where a wooden platform will sit. Overlap edges by 2 inches and press the embossing indicator flat to confirm proper adhesion.
- Construct a Floating Platform: Build a simple wooden frame (2 × 4s) and cover it with plywood. This platform isolates the recording area from the concrete slab, further reducing low‑frequency transmission.
- Mount Absorptive Panels: Arrange the ZonaSonic Brick Panels on the walls surrounding the microphone, maintaining a 2‑inch gap from the floor to avoid bass trapping. Use the self‑adhesive backing; for larger areas, apply a thin layer of construction adhesive beneath the panel for added security.
- Seal Gaps: Apply acoustic caulk around door frames, window edges, and any seams between panels. This step prevents flanking noise paths that could bypass the installed materials.
- Test and Tune: Record a short speech sample and analyze the waveform for background hiss or echo. Adjust panel placement or add additional deadening as needed.
Best Practices & Tips
- Use a staggered brick pattern for wall panels to avoid parallel surfaces that can reinforce standing waves.
- Combine butyl deadening with a thin layer of mass‑loaded vinyl for maximum low‑frequency attenuation.
- Maintain a small air gap (approximately 1‑2 inches) between the absorptive panels and the wall to improve broadband absorption.
- Install a weather‑stripping seal on the garage door perimeter to reduce air‑borne noise infiltration.
- Consider adding a portable acoustic blanket behind the microphone for quick adjustments during different recording sessions.
Frequently Asked Questions
- Can I soundproof a garage without permanently altering the structure?
- Yes. All recommended products use peel‑and‑stick adhesives and removable caulk, allowing you to restore the garage to its original condition when needed.
- How many ZonaSonic panels are required for a 10 × 12 ft recording area?
- Approximately 24 panels (a 4 × 6 grid) will provide coverage of 144 sqft, delivering an NRC of 0.95 across the entire wall surface.
- Will the VOISEN deadener affect the garage door’s ability to open and close?
- No. The mat is thin enough to maintain the door’s mechanical operation, and the adhesive does not interfere with hinges or tracks.
- Is the KILMAT mat safe for use on concrete floors?
- Yes. The butyl layer adheres well to concrete, and the product is non‑toxic and odorless once installed.
- Do I need professional acoustic measurement equipment?
- While a calibrated sound level meter provides precise data, a smartphone decibel app is sufficient for a basic assessment during the DIY process.
Conclusion
Transforming a shared garage into a high‑quality podcast studio is achievable through strategic application of mass loading, damping, and absorption. By following the assessment steps, selecting the appropriate products, and adhering to the installation guide, one can dramatically reduce external noise and internal reverberation. The result is a versatile recording space that coexists with other garage functions, delivering professional audio without the need for costly construction.
Products Featured in This Guide
ZonaSonic Brick Acoustic Foam Panels
Price: $35.99 | Rating: 4.7/5 (39 reviews)
Featured for its high NRC of 0.95, ultra‑high‑density construction, and self‑adhesive backing that simplifies wall installation while providing superior sound absorption.
VOISEN 5mm Aluminum Car Sound Deadener
Price: $26.98 | Rating: 4.3/5 (140 reviews)
Featured for its 5 mm thickness, 31 sqft coverage, and dual function of acoustic damping and heat insulation, making it ideal for garage doors and metal surfaces.
KILMAT 80mil Butyl Car Sound Deadener
Price: $24.95 | Rating: 4.8/5 (26,221 reviews)
Featured for its high‑adhesion butyl layer, 80 mil thickness, and embossing indicator that ensures proper installation on floors and ceilings to reduce structure‑borne vibration.
Frequently Asked Questions
What are the most cost‑effective materials for reducing noise transmission in a garage studio?
Mass‑loaded vinyl, dense drywall, and weather‑stripping seal gaps while staying budget‑friendly.
How can I improve acoustic absorption without sacrificing garage functionality?
Install removable acoustic panels or foam wedges on walls and ceiling, and add thick rugs or carpet on the floor.
What STC rating should I aim for to block typical neighborhood noise?
An STC of 45–50 is sufficient to attenuate traffic and voices, creating a quiet recording environment.
Do I need to treat the garage door for soundproofing?
Yes, add a solid core or add mass‑loaded vinyl and seal the perimeter with weather‑stripping to prevent leaks.
Can I soundproof a shared garage without major construction?
Absolutely; use DIY methods like adding resilient channels, sealing gaps, and hanging portable acoustic blankets for quick, reversible results.