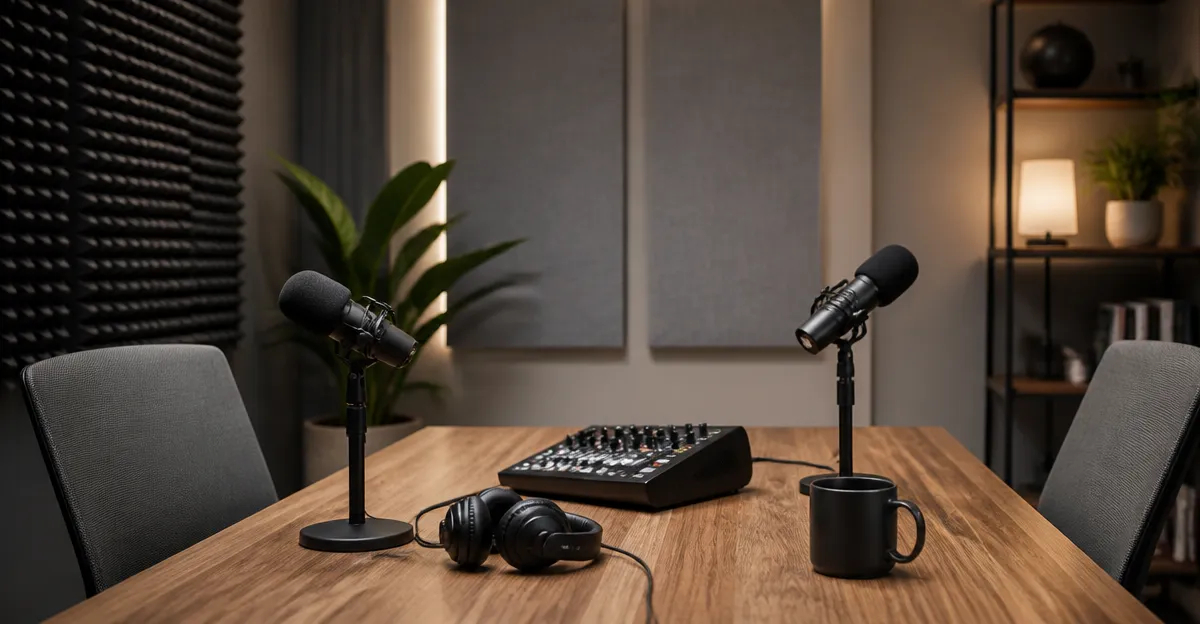
How to Improve Podcast Sound: Room Dimensions, Acoustics, and Practical Fixes
Introduction
Podcasters often underestimate the impact of the recording environment on audio quality. A room that is too reverberant or poorly sized can introduce echo, bass buildup, and inconsistent frequency response, which forces the host to rely on heavy post‑production processing. This guide explains how to evaluate room dimensions, apply acoustic treatment, and implement practical fixes that result in clear, professional‑sounding podcasts. By following the steps, one will understand why each adjustment matters, how to execute it efficiently, and which affordable products can accelerate the process.
The information presented is applicable to home studios, small office spaces, and dedicated podcast rooms. It balances technical depth with actionable advice, allowing an intermediate audience to achieve measurable improvement without extensive construction experience.
What You’ll Need
- Measuring tape or laser distance meter
- Acoustic treatment panels (e.g., TONOR Wood Slat Acoustic Panels, SD SODOCT Pyramid Acoustic Foam, NeatiEase Wood Slat Wall Panels)
- Adhesive, screws, or mounting hardware appropriate for the chosen panels
- Acoustic measurement software (e.g., REW or Audacity with a calibrated microphone)
- Basic tools: screwdriver, level, pencil, and utility knife
- Optional: Bass traps, diffusers, and portable acoustic blankets
Step 1 – Measure and Analyse Room Dimensions
Begin by measuring the length, width, and height of the intended recording space. Record the dimensions in meters and calculate the room volume, as the volume determines the natural resonant frequencies (room modes). Use the formula f = c/2 * sqrt((n/L)^2 + (m/W)^2 + (p/H)^2), where c is the speed of sound, and n, m, p are integer mode numbers. Identifying the lowest axial modes helps you decide where to place treatment.
For example, a room that measures 3.6 m × 3.0 m × 2.7 m will have a first axial mode around 47 Hz (length) and 57 Hz (width). These low frequencies tend to accumulate in corners, creating a boomy sound that can mask voice clarity. Understanding these values guides the placement of bass traps and wall panels.
Document the measurements in a simple spreadsheet. Include the calculated modal frequencies, as you will reference them when evaluating the effectiveness of treatment.
Step 2 – Identify Problem Areas Using Test Recordings
Place a calibrated omnidirectional microphone at the intended speaking position and record a short spoken paragraph. Playback the recording through headphones and listen for echo, flutter, or excessive low‑frequency rumble. Use a spectrum analyser to visualise frequency response; peaks at the modal frequencies identified in Step 1 indicate problematic areas.
Typical issues include:
- Long reverberation times above 0.3 seconds in the 200‑500 Hz range
- Distinct peaks at 50‑80 Hz suggesting bass buildup
- Flat or overly bright response above 8 kHz caused by reflective surfaces such as windows or glass doors
These observations will inform the type and quantity of acoustic panels required.
Step 3 – Install Primary Absorption Panels
Primary absorption targets first‑reflection points on the side walls and ceiling. To locate these points, sit at the microphone position and have a helper move a small mirror along the wall; the spot where the mirror reflects the microphone is a first‑reflection point.
At each identified location, install a panel that combines aesthetic appeal with sound‑damping performance. The TONOR Wood Slat Acoustic Panels provide high‑density polyester fiber core, medium‑density fiberboard, and a walnut veneer. They absorb mid‑range frequencies while adding a warm visual element. Each panel measures 47.2 in × 23.6 in and covers 15.5 sq ft per 2‑panel set; the 4‑panel pack costs $98.99, carries a 4.5‑star rating from 891 reviews, and includes mounting hardware for both adhesive and screw installation.
Mount the panels at ear level on the side walls and at a 45‑degree angle on the ceiling to intercept reflected sound. Use the supplied screws for a secure attachment; the wood veneer ensures durability and a premium appearance that integrates with most décor styles.
If budget constraints limit the number of wooden panels, supplement with the SD SODOCT Pyramid Acoustic Foam. This 24‑pack of 2‑inch‑thick pyramids offers a high NRC (Noise Reduction Coefficient) and a modern geometric design. Priced at $34.99 with a 4‑star rating from 2,364 reviews, the foam excels at mid‑high frequency absorption and can be installed on the ceiling or upper wall sections using construction adhesive or double‑sided tape.
Step 4 – Treat Bass Frequencies with Corner Bass Traps
Low‑frequency modes accumulate in room corners. While the wooden slat panels improve mid‑range clarity, they do not significantly attenuate frequencies below 80 Hz. To address this, create bass traps by stacking dense acoustic foam or constructing DIY traps using mineral wool wrapped in breathable fabric.
For a quick solution, the NeatiEase Wood Slat Wall Panels can be cut to fit corner seams and installed vertically. Each panel measures 96 in × 12.6 in, covers 33 sq ft per 4‑panel set, and costs $179.99 with a 4.6‑star rating from 535 reviews. The panels are constructed from MDF and high‑density polyester fiber, offering both aesthetic elegance and moderate low‑frequency absorption.
Place the panels flush against each corner, extending from floor to ceiling when possible. The combination of wood and dense fiberboard helps dampen bass while preserving a cohesive visual theme.
Step 5 – Add Diffusion for a Balanced Sound Field
Absorption alone can create a dead sounding room, which reduces natural ambience and can make speech sound flat. Diffusers scatter sound energy, preserving a sense of space while preventing flutter echo. While the product list does not include dedicated diffusers, the beveled‑edge design of the Ekkogo Acoustic Wall Panels provides a subtle diffusion effect.
The Ekkogo 12‑pack features 0.4 in thick, high‑density poly‑fiber panels with an NRC up to 0.95. Priced at $20.39 and rated 4.2 stars by 487 reviewers, these panels are lightweight, easy to cut, and can be arranged in a checkerboard pattern to break up standing waves. Install them on the rear wall opposite the microphone to scatter residual reflections without sacrificing absorption.
Because the panels are square and come in multiple colours, they can double as decorative elements, enhancing the visual appeal of the podcast studio.
Step 6 – Fine‑Tune with Portable Acoustic Blankets
Even after installing permanent panels, occasional recordings may occur in slightly different positions. Portable acoustic blankets allow rapid adjustment of reflection points. Hang a blanket from a wall‑mounted rod or drape it over a doorway to reduce early reflections from hard surfaces.
While not listed among the recommended products, a standard 10 lb‑grade acoustic blanket costs approximately $30 and can be stored when not in use. This flexibility ensures consistent audio quality across varied recording setups.
Tips & Pro Tips
- Maintain a symmetrical layout; asymmetrical placement can cause uneven frequency response.
- Use a level when mounting panels to avoid gaps that let sound leak through.
- Leave a small air gap (approximately 2 in) between the panel and the wall to increase low‑frequency absorption.
- Test the room after each installation phase; incremental improvements are easier to evaluate than a single large overhaul.
- When cutting panels, use a fine‑toothed saw for wood and a sharp utility knife for foam to achieve clean edges.
- Consider adding a rug or carpet to the floor; hard flooring reflects low frequencies back into the room.
Troubleshooting
Problem: Persistent echo despite installed panels.
Solution: Verify that all first‑reflection points are covered. Use the mirror method again and add additional foam (e.g., SD SODOCT Pyramid Foam) to uncovered spots. Ensure the panels are flush with the wall; any air gap larger than 2 in reduces effectiveness.
Problem: Voice sounds muffled after adding too many absorbers.
Solution: Reduce absorption in the high‑frequency range by removing or repositioning some foam panels. Introduce diffusion using Ekkogo panels or a bookshelf filled with irregular objects.
Problem: Low‑frequency boom persists.
Solution: Increase corner bass trap density. Consider adding mineral‑wool traps or stacking additional NeatiEase wood panels in the corners to increase mass.
Conclusion
Improving podcast sound requires a systematic approach that begins with accurate measurement, proceeds through targeted acoustic treatment, and finishes with fine‑tuning based on real‑world testing. By analysing room dimensions, installing high‑quality absorption panels such as TONOR Wood Slat Acoustic Panels, supplementing with SD SODOCT Pyramid Foam, and adding diffusion with Ekkogo panels, one can achieve a balanced, professional‑grade recording environment. The recommended products provide a blend of aesthetic appeal, acoustic performance, and cost‑effectiveness, allowing podcasters to focus on content rather than technical limitations.
Apply the steps outlined in this guide, monitor the results with measurement software, and adjust as needed. Consistent attention to room acoustics will elevate the clarity and impact of every episode, fostering audience growth and listener satisfaction.
Products Mentioned in This Guide
Frequently Asked Questions
How do room dimensions affect podcast audio quality?
Large, irregularly shaped rooms can cause echo and uneven frequency response, while smaller, well‑proportioned spaces produce clearer, more balanced sound.
What basic acoustic treatments are essential for a home podcast studio?
Install broadband absorption panels at first reflection points, add bass traps in corners, and use diffusers to scatter remaining reflections.
Can I improve my podcast sound without major construction?
Yes—use portable acoustic panels, movable gobos, and DIY solutions like thick blankets or foam wedges to tame reflections quickly.
How do I locate the first reflection points in my recording space?
Place a mirror on the wall and have a friend move a microphone; wherever you see the microphone in the mirror is a first reflection point that needs treatment.
What affordable products can help reduce bass buildup in a small room?
Low‑cost bass traps made from rockwool or dense foam, placed in room corners, effectively absorb low frequencies without extensive remodeling.